Before you start!!! Realize that this
method is not the best for a beginner to mushroom cultivation. If you are
a beginner and would like to see the newbie way, go to Psylocybe Fanaticus's page. You can
check out his tek and get spores from there (unless you only grow legal,
edible mushrooms like I do ;) ). Ideally, you should have a couple of
harvests with the PF-tek before you go on to whole grains. It lets you
learn about the life cycle of the mushrooms and is much more forgiving
about sterility matters. Enough BS, here's my way :p.
Step
1: Acquire 1 pint wide mouth canning jars and lids. That
is the minimum size I suggest using for this method, bigger is better
though if you have the room. The lids should have 1 hole poked
through them as in fig. 1. **Note 11-7-00** After having some
complications with jars sealing during pressure cooking, and not getting
any oxygen, effectively stopping all growth, I've found it's better to use
the lids upside down a la PF tek.**End Note** You will also need birdseed
(any kind that is comprised mostly of white millet should work fine), a
pressure cooker and aluminum foil. The brand of seed I used this time is
shown in fig 1a.  Fig.1
Fig.1 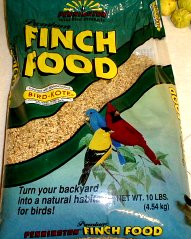 Fig.1a
Step 2: Measure out 2/3 cup birdseed into
every pint jar. Since the birdseed I got this time came with bird-kote on
it (fig. 1a), I rinsed it off as well as possible. I've had decent results
even with the bird-kote, but I just feel better with it off for some
reason :) . To rinse, I just mixed in some water (enough to cover it all)
stirred and let it soak for a few minutes then drained the jars. Figure 4
is what was drained off.....yummy eh? See figs. 2, 3, and 4. 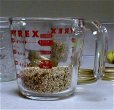 Fig. 2
 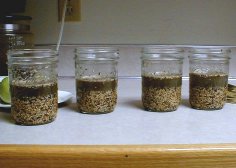 Fig.3
Fig.3 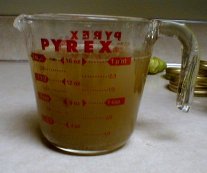 Fig4.
Fig4.
Step 3: Next you need to add the water. I
used 1/3 cup water to 2/3 cup birdseed which has been working quite
consistently for me. Even with different batches of seed. See fig. 5.
 Fig.5
Fig.5
Next is a pic of some jars ready to be capped with
foil and put in the pressure cooker. 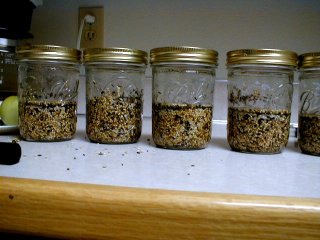 The birdseed before cooking
Step 4: Cover the jar lids with aluminum
foil and pressure cook at 15 psi for an hour. Having a pressure cooker is
absolutely essential in using this method. Don't even try it if you don't
have one. I just left the jars in the cooker overnight after cooking and
let them cool slowly, but I've thrown them in the freezer right after
cooking before to cool them off quickly with no problems.  Fig.6
Fig.6
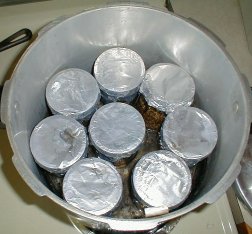 Fig.7
Fig.7
Step 5: Wait until the jars are cool to the
touch before going on. Taping the holes on the lids while the
jar/substrate is still hot will cause a vacuum inside the jar that will
suck in surrounding air when the tape is lifted for inoculation. I usually
turn the oven on (~250 F)and remove the tray a little (the oven-tek). I
use the tray to sit the jars on while I remove the foil and tape the holes
in the lids, being as sterile as possible. The hot air coming out of the
oven will help keep contaminants away from the area. After the jars are
taped, give them a nice shake to break up all the grain. Fig. 8 shows the
prepared jars ready for inoculation. 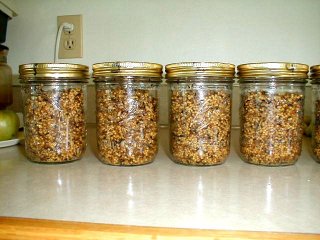 Fig.8
Prepared birdseed
Fig.8
Prepared birdseed
Step 6 Next, all you need to do is inoculate the
jars via syringe. You can use the oven tek again for this but it is
usually sufficient to do it in a clean room with no air movement. It
usually takes around 3 days to see growth in the jars. I don't shake after
I inoculate until I see growth, but many do with success, it's a matter of
preference. After the mycelium starts growing well, give the jars a good
shake. This will distribute colonized kernels throughout the jar, they
will recover in 24-48 hours usually and begin growing and spreading to
more grain kernels. I usually end up shaking them up 2-4 times while
they're colonizing. Average colonization time with 1cc spore solution is
2-3 weeks. If they suddenly stop growing, loosen the lid or pull the tape
off (using the oven tek if you want to be really safe), it's most likely
due to lack of oxygen, which is the only problem I've had with my method.
I haven't had a chance to try polyfill instead of tape yet, but I may give
it a shot someday, I'm sure that would eliminate the problem. After
colonized, the seed is cased with vermiculite, 50/50+ or other appropriate
casing. Happy growing!